Deploy vLLM on AWS EC2: Private Model Inference Guide
For high-concurrency production workloads, vLLM delivers between two and four times higher request throughput than standard Hugging Face Transformers or basic TGI implementations. Self-hosting vLLM on an Amazon Web Services (AWS) EC2 instance inside a private Virtual Private Cloud (VPC) eliminates third-party API token fees, keeps sensitive proprietary data within your compliance boundary, and achieves predictable sub-50-millisecond time-to-first-token latencies.
This production manual walks you through building an isolated, enterprise-grade vLLM inference server on AWS EC2. You will learn how to size GPU instances, configure zero-ingress VPC security, pull model weights from Amazon S3 or Hugging Face, run vLLM via Docker, and tune engine parameters like PagedAttention and continuous batching.
Why vLLM on AWS EC2 Beats Commercial APIs for Private Inference
When scaling generative AI applications in production, relying on public cloud API providers introduces three major friction points: escalating token costs at scale, strict rate limits, and regulatory concerns regarding third-party data processing. Self-hosting on AWS EC2 resolves all three issues while giving engineering teams complete control over inference hardware and memory allocation.
vLLM has emerged as the open-source standard for high-throughput LLM serving. Its core innovation lies in PagedAttention, an algorithm that manages Attention Keys and Values (KV cache) in virtual memory blocks. Traditional framework serving wastes 60% to 80% of GPU memory due to fragmentation and static allocation for peak sequence lengths. PagedAttention reduces memory waste to under 4%, allowing you to increase batch sizes and quadruple token throughput on the exact same GPU hardware.
Key Benefits of Self-Hosted vLLM on AWS
- Complete Data Sovereignty: Model weights and incoming user prompts never leave your private AWS VPC subnets. No external telemetry or logging occurs.
- Cost Efficiency at Scale: For workloads processing millions of daily tokens, instance flat-rate pricing on EC2 G5 or G6 instances yields significant savings compared to per-token third-party pricing.
- OpenAI API Compatibility: vLLM natively exposes an HTTP server that mimics OpenAI API endpoint signatures (`/v1/chat/completions` and `/v1/completions`). You can swap your backend URL without changing client application code.
- Flexible Hardware Selection: AWS provides specialized GPU instances suited for small 7B parameter models up to massive 70B+ parameter distributed clusters.
At Saasbonus, our independent benchmarking tests software and infra architectures so engineering teams pick the right stack the first time. Combining vLLM with isolated AWS EC2 infrastructure delivers optimal cost-to-performance metrics for privacy-focused SaaS products.
Benchmarking EC2 GPU Instances for vLLM Workloads
Selecting the correct EC2 instance family depends directly on model size, precision (FP16, BF16, or INT4/INT8 quantization), and expected request concurrency. You must calculate both the VRAM required to hold the model weights and the remaining VRAM dedicated to the KV cache.
As a baseline rule of thumb, a 7-billion parameter model in 16-bit precision requires roughly 14 GB of VRAM just to load weights. Reserving 10 GB to 20 GB for KV cache means a single 24 GB or 32 GB GPU is ideal. A 70-billion parameter model in 16-bit precision requires over 140 GB of VRAM, mandating multi-GPU tensor parallelism across four or eight GPUs.
| Instance Family | GPU Model | VRAM per GPU | Total VRAM | Primary Use Case | Relative Cost |
|---|---|---|---|---|---|
| g6.xlarge | 1x NVIDIA L4 | 24 GB GDDR6 | 24 GB | 7B-8B Models (INT8/FP16), Cost-optimized | Lowest |
| g5.xlarge | 1x NVIDIA A10G | 24 GB GDDR6 | 24 GB | 7B-8B Models (FP16), Low Latency | Low |
| g5.12xlarge | 4x NVIDIA A10G | 24 GB GDDR6 | 96 GB | 13B-34B Models, 70B Quantized | Medium |
| p4d.24xlarge | 8x NVIDIA A100 | 40 GB HBM2 | 320 GB | 70B FP16 Models, High Concurrency | High |
| p5.48xlarge | 8x NVIDIA H100 | 80 GB HBM3 | 640 GB | Enterprise Multi-Tenant 70B+ Clusters | Premium |
For most production teams starting out, the g6.xlarge (NVIDIA L4) or g5.xlarge (NVIDIA A10G) provides the best balance of cost and performance for 8B models like Llama 3 8B or Qwen 2.5 7B.
Network Architecture and Security Model
Exposing an inference server directly to the public internet creates severe security risks. Model endpoints can be targeted by denial-of-service attacks or prompt injection vectors, leading to massive AWS bill spikes or data exposure.
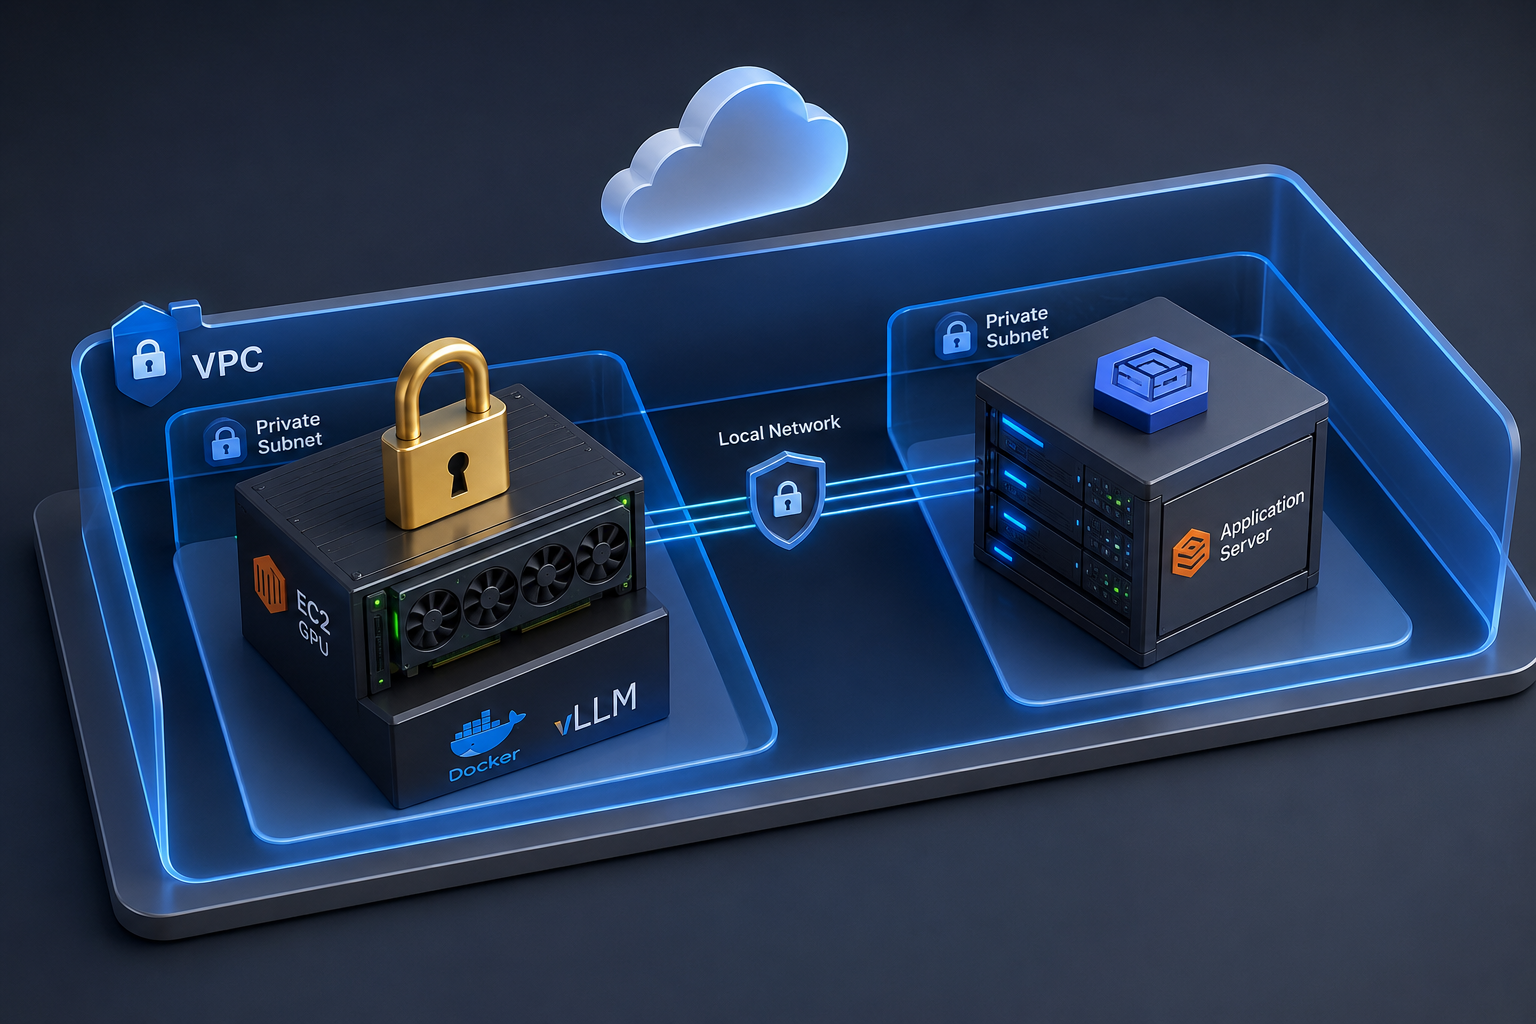
Our architecture enforces a strict zero-ingress private setup. The EC2 instance resides entirely inside a private subnet with no public IP address and no inbound open security group ports.
How Traffic Flows Privately
- In-VPC Applications: App servers running in the same VPC (or peered VPCs) connect to vLLM directly via private IP or an internal Network Load Balancer (NLB) on port 8000.
- Developer & Admin Access: Engineers connect to the private vLLM endpoint securely using AWS Systems Manager (SSM) port forwarding. No SSH keys or bastion hosts are required.
- Outbound Internet Access: The EC2 instance accesses external resources (such as downloading model weights from Hugging Face or container images from AWS ECR) through an AWS NAT Gateway attached to the private subnet. Alternatively, weights can be fetched directly inside the AWS network via an S3 VPC Endpoint.
Prerequisites and Infrastructure Requirements
Before provisioning your EC2 instance, confirm you have configured the following AWS components:
- AWS Account & IAM Permissions: Rights to manage EC2 instances, Security Groups, IAM Roles, and Systems Manager.
- Service Quotas: Request an AWS limit increase for GPU instances (e.g., Running On-Demand `G and VT instances` vCPUs) if your account is new.
- VPC Setup: A Virtual Private Cloud containing at least one Private Subnet routed to a NAT Gateway.
- AWS CLI & SSM Plugin: Installed on your local administrative machine for remote port-forwarding management.
Step 1: Provisioning the EC2 GPU Instance
Launch your GPU instance using the AWS Management Console or AWS CLI. Using Amazon Linux 2023 or Ubuntu 22.04 LTS as the base operating system is recommended.
Execute the following AWS CLI command to launch a `g5.xlarge` instance in your private subnet:
```bash aws ec2 run-instances \ --image-id ami-0c7217cdde317cfec \ --instance-type g5.xlarge \ --key-name my-key-pair \ --security-group-ids sg-0123456789abcdef0 \ --subnet-id subnet-0123456789abcdef0 \ --iam-instance-profile Name=vLLM-EC2-SSM-Role \ --block-device-mappings '[{"DeviceName":"/dev/xvda","Ebs":{"VolumeSize":150,"VolumeType":"gp3"}}]' \ --tag-specifications 'ResourceType=instance,Tags=[{Key=Name,Value=vLLM-Inference-Server}]' ```
Storage Requirement Note
Always set your Root EBS Volume size to at least 150 GB using `gp3` storage. Machine learning containers, CUDA libraries, and large model checkpoint files will quickly exceed standard 8 GB or 30 GB EBS default allocations.
IAM Role Configuration
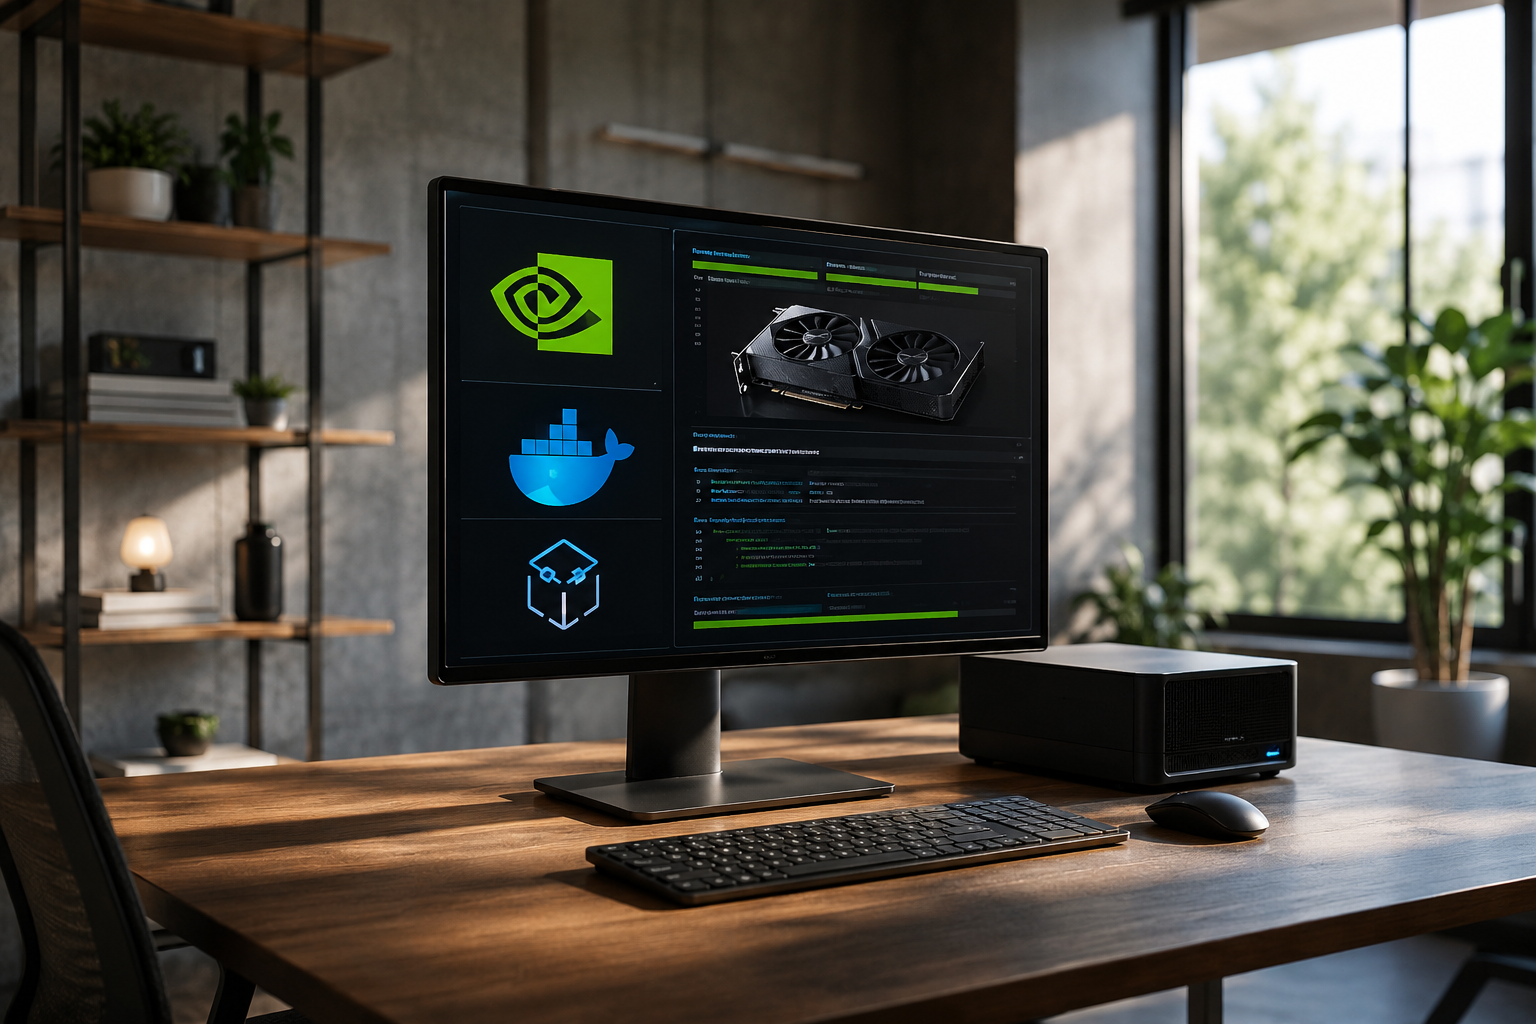
Attach an IAM Role to the instance containing the managed policy `AmazonSSMManagedEC2InstanceDefaultPolicy`. If fetching weights from an S3 bucket, attach an inline S3 Read Policy granting access to `s3://your-model-weights-bucket/*`.
Step 2: Configuring NVIDIA Drivers, Docker, and Container Runtime
Using official AWS Deep Learning Containers (DLC) or configuring NVIDIA Container Toolkit allows vLLM to interact directly with the underlying GPU acceleration hardware.
Connect to your newly provisioned instance using AWS SSM Session Manager:
```bash aws ssm start-session --target i-0123456789abcdef0 ```
Once logged into the instance shell, update software repositories and install Docker:
```bash sudo dnf update -y sudo dnf install docker -y sudo systemctl enable docker --now sudo usermod -aG docker ec2-user ```
Next, install the NVIDIA Container Toolkit so Docker containers can mount GPU devices:
```bash curl -s -L https://nvidia.github.io/libnvidia-container/stable/rpm/nvidia-container-toolkit.repo | \ sudo tee /etc/yum.repos.d/nvidia-container-toolkit.repo
sudo dnf install -y nvidia-container-toolkit sudo nvidia-ctk runtime configure --runtime=docker sudo systemctl restart docker ```
Verify that Docker recognizes your GPU hardware by running a bare test container:
```bash docker run --rm --gpus all nvidia/cuda:12.8.0-base-ubuntu22.04 nvidia-smi ```
You should see an output table displaying your NVIDIA GPU model, driver version, and CUDA version.
Step 3: Managing Model Weights Securely
vLLM downloads weights dynamically at startup if given a Hugging Face model repository ID. However, downloading multi-gigabyte models over the internet every time a container restarts creates startup bottlenecks and operational risk.
Here are two options for managing model weights in private environments:
Option A: Persistent Host Directory Caching
Create a persistent host directory on the EBS volume to store Hugging Face weights. Mount this host directory inside the container.
```bash mkdir -p /home/ec2-user/hf_cache export HF_TOKEN="hf_your_access_token_here" ```
Passing your `HF_TOKEN` allows access to gated models such as Llama 3 or Gemma.
Option B: Pre-loading Weights from Amazon S3
For maximum security, sync weights from Hugging Face into a private Amazon S3 bucket, then pull them during deployment. This prevents the EC2 instance from contacting external model registries during production execution.
```bash
Download weights locally or via a build pipe
huggingface-cli download meta-llama/Meta-Llama-3-8B-Instruct --local-dir ./llama3-8b
Sync to S3
aws s3 sync ./llama3-8b s3://my-company-private-models/llama3-8b/ ```
On the EC2 instance, pull directly from S3:
```bash mkdir -p /home/ec2-user/models/llama3-8b aws s3 sync s3://my-company-private-models/llama3-8b/ /home/ec2-user/models/llama3-8b/ ```
Step 4: Deploying vLLM via Container
AWS provides official Deep Learning Containers pre-configured with CUDA, PyTorch, and vLLM runtime libraries. Alternatively, you can use the official vLLM project image.
Execute the following command to launch the vLLM OpenAI-compatible server in detached mode:
```bash docker run -d \ --name vllm-server \ --restart unless-stopped \ --gpus all \ -p 8000:8000 \ -v /home/ec2-user/hf_cache:/root/.cache/huggingface \ -e HF_TOKEN=$HF_TOKEN \ public.ecr.aws/deep-learning-containers/vllm:latest-gpu-py312-cu130-ubuntu22.04-ec2 \ --model Qwen/Qwen2.5-7B-Instruct \ --port 8000 \ --max-model-len 8192 \ --gpu-memory-utilization 0.90 ```
Docker Command Parameter Breakdown
- `-d`: Runs the container as a background daemon process.
- `--restart unless-stopped`: Ensures the inference engine auto-restarts if the instance reboots.
- `--gpus all`: Passes all instance GPU accelerators into the container runtime.
- `-v /home/ec2-user/hf_cache:/root/.cache/huggingface`: Mounts host storage so downloaded weights persist across container reinstantiations.
- `--gpu-memory-utilization 0.90`: Configures vLLM to allocate 90% of available VRAM for model weights and KV cache, leaving 10% for PyTorch execution headroom.
- `--max-model-len 8192`: Caps maximum context window to prevent unexpected out-of-memory errors on long requests.
Monitor startup initialization using Docker container logs:
```bash docker logs -f vllm-server ```
When you see `Uvicorn running on http://0.0.0.0:8000`, your server is active and ready to accept inference requests.
Step 5: Connecting Privately and Testing the API
Because your instance has no open public ingress ports, test connectivity locally using an SSM port-forwarding tunnel.
Run this AWS CLI command from your local developer machine:
```bash aws ssm start-session \ --target i-0123456789abcdef0 \ --document-name AWS-StartPortForwardingSession \ --parameters '{"portNumber":["8000"],"localPortNumber":["8000"]}' ```
With the SSM session running in your terminal, open a second terminal tab and query the models endpoint:

```bash curl http://localhost:8000/v1/models ```
Expected response:
```json { "object": "list", "data": [ { "id": "Qwen/Qwen2.5-7B-Instruct", "object": "model", "created": 1718000000, "owned_by": "vllm" } ] } ```
Now issue an OpenAI-compatible Chat Completions API payload:
```bash curl http://localhost:8000/v1/chat/completions \ -H "Content-Type: application/json" \ -d '{ "model": "Qwen/Qwen2.5-7B-Instruct", "messages": [ {"role": "system", "content": "You are a helpful technical assistant."}, {"role": "user", "content": "Explain vLLM PagedAttention in two sentences."} ], "temperature": 0.7, "max_tokens": 150 }' ```
Step 6: Advanced vLLM Tuning for Production Performance
Out-of-the-box configurations work well for dev testing, but production deployments require optimization based on concurrency targets, latency bounds, and hardware constraints.
1. Multi-GPU Tensor Parallelism (`--tensor-parallel-size`)
When hosting larger models (e.g., 13B to 70B parameter models), split model weights across multiple GPUs on a single instance using Tensor Parallelism. On a four-GPU `g5.12xlarge` instance, pass:
```bash --tensor-parallel-size 4 ```
vLLM uses Megatron-LM tensor parallel strategies under the hood, sharding linear layers evenly across all GPUs over high-speed NVLink or PCIe buses.
2. Chunked Prefill (`--enable-chunked-prefill`)
Large input prompts (long context RAG applications) create prefill latency spikes that block smaller incoming generation requests. Enabling chunked prefill breaks long prompt processing into smaller chunks, interleaving prefill computation with token generation cycles:
```bash --enable-chunked-prefill --max-num-batched-tokens 2048 ```
This flag significantly improves tail latency (P99) in mixed-workload SaaS applications.
3. Quantization Engines (AWQ & FP8)
Running models in 8-bit or 4-bit precision reduces memory footprint by 50% to 75%, allowing larger models to fit into smaller, less expensive EC2 GPU instances.
To load an AWQ quantized model on an EC2 instance, specify the quantization mode:
```bash --model TheBloke/Llama-2-13B-Chat-AWQ \ --quantization awq ```
On NVIDIA Ada Lovelace or Hopper GPUs (found in AWS G6 and P5 instances), vLLM supports native FP8 execution, retaining near-FP16 accuracy with twice the throughput.
Step 7: Systemd Service Wrapper for High Availability
To ensure your inference process restarts automatically after system updates or host failure, encapsulate Docker management inside a systemd system service.
Create a service configuration file at `/etc/systemd/system/vllm.service`:
```ini [Unit] Description=vLLM Inference Service Docker Container After=docker.service Requires=docker.service
[Service] Type=simple Restart=always RestartSec=10 ExecStartPre=-/usr/bin/docker stop vllm-server ExecStartPre=-/usr/bin/docker rm vllm-server ExecStart=/usr/bin/docker run --name vllm-server \ --gpus all \ -p 8000:8000 \ -v /home/ec2-user/hf_cache:/root/.cache/huggingface \ -e HF_TOKEN=hf_your_access_token_here \ public.ecr.aws/deep-learning-containers/vllm:latest-gpu-py312-cu130-ubuntu22.04-ec2 \ --model Qwen/Qwen2.5-7B-Instruct \ --port 8000 \ --max-model-len 8192 \ --gpu-memory-utilization 0.90 ExecStop=/usr/bin/docker stop vllm-server
[Install] WantedBy=multi-user.target ```
Reload systemd, enable the service, and verify its status:
```bash sudo systemctl daemon-reload sudo systemctl enable vllm.service sudo systemctl start vllm.service sudo systemctl status vllm.service ```
Troubleshooting Common Production Errors
CUDA Out of Memory (OOM) Errors
If the container crashes immediately with `torch.cuda.OutOfMemoryError`, vLLM is trying to allocate more VRAM than the physical GPU possesses.
Solutions:
- Lower `--gpu-memory-utilization` from `0.90` to `0.80` or `0.85`.
- Reduce `--max-model-len` (e.g., from `16384` to `8192` or `4096`) to shrink the maximum KV cache footprint per request.
- Enforce sequence limits with `--max-num-seqs 64` to cap concurrent active requests.
Container Fails to Detect NVIDIA GPU
If logs state `No CUDA-capable device is detected`, Docker is failing to interface with NVIDIA hardware drivers.
Solutions:
- Re-run `sudo nvidia-ctk runtime configure --runtime=docker` and restart Docker (`sudo systemctl restart docker`).
- Confirm host GPU status by running `nvidia-smi` directly on the host instance.
Model Download Timeouts
Large models (20 GB+) downloaded directly from Hugging Face during boot can trigger connection timeouts.
Solutions:
- Pre-download weights into an S3 bucket and use `aws s3 sync` during boot scripts.
- Utilize `--max-model-len` and set environment variable `HF_HUB_ENABLE_HF_TRANSFER=1` to speed up multi-threaded downloading.
Cost Optimization Strategies for EC2 GPU Hosting
Running GPU instances on AWS around the clock can quickly grow expensive if unmonitored. Implement these strategies to maintain low operational expenses:
- Use AWS Savings Plans or Reserved Instances: Committing to 1-year or 3-year compute usage drops G5 and G6 instance hourly costs by 30% to 50% compared to standard On-Demand pricing.
- Leverage Spot Instances for Non-Critical Batch Workloads: Spot instances offer up to 70% discounts. Pair vLLM with AWS Auto Scaling groups so stateless workers gracefully re-queue jobs if an instance interruption occurs.
- Automate Nightly Shutdowns for Non-Production Staging: For staging or development instances, configure AWS EventBridge rules to stop instances outside business hours, saving over 60% on non-production infrastructure bills.
At Saasbonus, evaluating hosting trade-offs across SaaS engines and cloud infrastructure helps engineering leadership optimize both capital expenditure and operational reliability.
Final Architectural Summary
Deploying vLLM on AWS EC2 combines high-throughput model serving, enterprise privacy controls, and predictable infrastructure spending. By enforcing private VPC network isolation, configuring AWS DLC containers, and tuning vLLM parameters like PagedAttention and tensor parallelism, you build an autonomous inference pipeline capable of powering production generative AI applications.
To continue evaluating developer tools, cloud architectures, and production SaaS software comparisons, explore the hands-on engineering reviews published on Saasbonus.